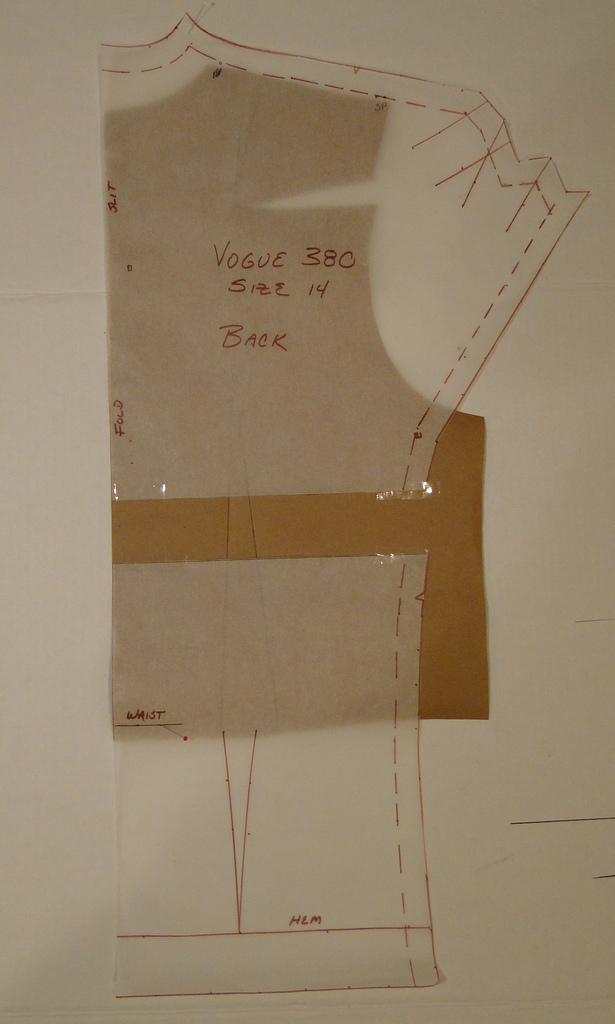
I fully intended to post part 2 of the pattern resizing shortly after part 1, but I had to put it aside when I realized I had volunteered to present the program at the July sewing guild meeting, and hadn't done any preparation. I did the presentation, which was on Sewing with a Plan (SWAP). So here we go on the Vogue 380 blouse front pattern resizing. Many of the steps are the same as those used on the back pattern piece, but the front has some decorative tucks, located on a center front seam above the bust, that impacted the pattern changes.
Here is the original blouse front pattern piece

And here is the copy of the front pattern with all the markings

which I will compare to my sloper. I rotated part of the waist dart on my sloper front to the side like the blouse pattern.

1. Pattern Sloper Comparison - Front
Align the center front of the pattern with the center front of the sloper
Align the waistline seam of the pattern with the waistline seam of the sloper

The center front tucks don’t appear to contribute to bust shaping. But unfolded, they make it hard to line up the center front and check the fit in the neck area. So I form the tucks and smooth the pattern so it is flat and the center front seam is straight. Now I can match up the center front easily. I was surprised to see that the tucks reallly pull the fabric in the shoulder area down and affects the fit in that area. So I will do all the pattern changes with the tucks folded.

2. Vertical Adjustments
The front is too short. The neck point of the pattern is below the neck point of the sloper about 5/8 inch. I will be adding less length in the front than I did it the back. This is normal for me. The underarm point of the pattern is way below the underarm of my sloper so I add the length below the arm hole opening, slashing from side seam to neck point in an "L" shape. This lets me to raise the shoulder, raise the underarm point and rotate the shoulder seam up the 1/2 inch needed for the shoulder pad in one operation.
3. Horizontal Adjustments
Shoulder
I also notice that the neck point, where the close fitting raised neckline should start to go up the side of the neck, needs to be moved closer to my neck opening. To get the correct shape of the raised neckline I put a small piece of tissue paper over the pattern and redraw the raised neck so it starts at my shoulder point.

Width at Bust- no changes.
Width at Waist - I compare the sloper dart width to pattern tuck take up. I need some extra width in the waist and I add it at the side seam. I change the location of tucks to the center of the new waist width
Width at Hip - I add additional width to the pattern to equal ¼ of my hip measurement .
Here is what the final pattern looks like with the front tucks opened up again. The tucks really do pull the shoulder area down when they are formed.

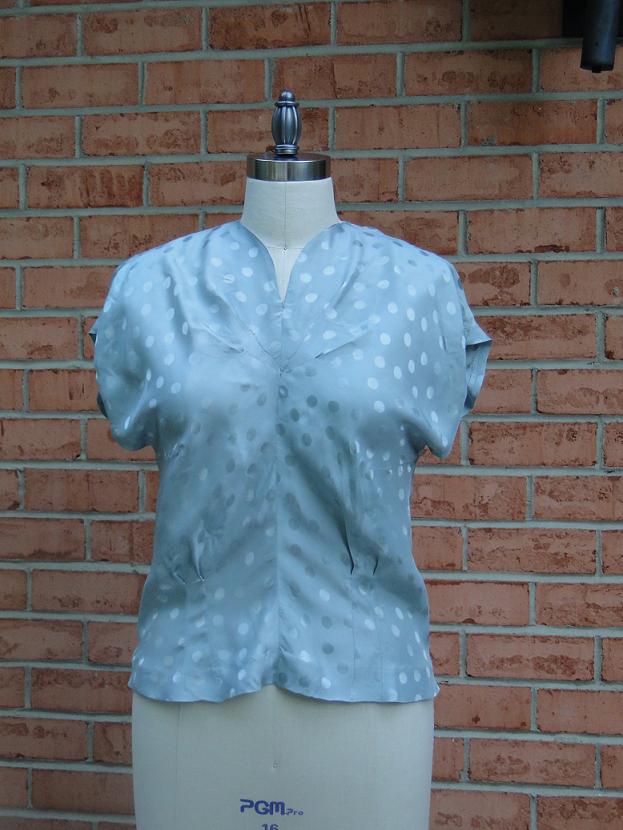
I checked the lengths of the side seams and shoulder seams to make sure they are the same on both the front and back. I drafted the front facing using the new shape of the neck area. I added a center back seam for fitting and easy sewing of the top back opening. I did not put a zipper in the side seam as suggested by the pattern. The fabric I used for this blouse was a rayon polka dot jacquard in a gray green color sometimes referred to a sea mist. I thought rayon was appropriate because it was available and used for clothing in the 1940’s. Back then it was called the “new silk”. Though my mother remembers the rayon from that time as cheap, flimsy fabric that did not hold up well. The tucks in the sleeve and the front are sunburst tucks, so named because they start at the same point and radiate out. The front seam is on the bias, so to get the tucks to match took a bunch of fiddling and hand basting. I sewed the tucks along the fold lines to hold them in place. The fabric was so soft, they drooped and looked sloppy without the stitching.
Here is the original blouse front pattern piece

And here is the copy of the front pattern with all the markings

which I will compare to my sloper. I rotated part of the waist dart on my sloper front to the side like the blouse pattern.

1. Pattern Sloper Comparison - Front
Align the center front of the pattern with the center front of the sloper
Align the waistline seam of the pattern with the waistline seam of the sloper

The center front tucks don’t appear to contribute to bust shaping. But unfolded, they make it hard to line up the center front and check the fit in the neck area. So I form the tucks and smooth the pattern so it is flat and the center front seam is straight. Now I can match up the center front easily. I was surprised to see that the tucks reallly pull the fabric in the shoulder area down and affects the fit in that area. So I will do all the pattern changes with the tucks folded.

2. Vertical Adjustments
The front is too short. The neck point of the pattern is below the neck point of the sloper about 5/8 inch. I will be adding less length in the front than I did it the back. This is normal for me. The underarm point of the pattern is way below the underarm of my sloper so I add the length below the arm hole opening, slashing from side seam to neck point in an "L" shape. This lets me to raise the shoulder, raise the underarm point and rotate the shoulder seam up the 1/2 inch needed for the shoulder pad in one operation.
3. Horizontal Adjustments
Shoulder
I also notice that the neck point, where the close fitting raised neckline should start to go up the side of the neck, needs to be moved closer to my neck opening. To get the correct shape of the raised neckline I put a small piece of tissue paper over the pattern and redraw the raised neck so it starts at my shoulder point.

Width at Bust- no changes.
Width at Waist - I compare the sloper dart width to pattern tuck take up. I need some extra width in the waist and I add it at the side seam. I change the location of tucks to the center of the new waist width
Width at Hip - I add additional width to the pattern to equal ¼ of my hip measurement .
Here is what the final pattern looks like with the front tucks opened up again. The tucks really do pull the shoulder area down when they are formed.

I checked the lengths of the side seams and shoulder seams to make sure they are the same on both the front and back. I drafted the front facing using the new shape of the neck area. I added a center back seam for fitting and easy sewing of the top back opening. I did not put a zipper in the side seam as suggested by the pattern. The fabric I used for this blouse was a rayon polka dot jacquard in a gray green color sometimes referred to a sea mist. I thought rayon was appropriate because it was available and used for clothing in the 1940’s. Back then it was called the “new silk”. Though my mother remembers the rayon from that time as cheap, flimsy fabric that did not hold up well. The tucks in the sleeve and the front are sunburst tucks, so named because they start at the same point and radiate out. The front seam is on the bias, so to get the tucks to match took a bunch of fiddling and hand basting. I sewed the tucks along the fold lines to hold them in place. The fabric was so soft, they drooped and looked sloppy without the stitching.


The blouse fits well and looks very much like the drawing which was very satisfying for a first resizing effort.


Next post will be on the resizing of the skirt. And then back to showing you current fashions, the summer clothes I sewed for my SWAP presentation.