Thursday, December 17, 2020

Hoodie Challenge - Garment Designer

Anyone else lose their sewing motivation during this Covid-19 quarantining, self isolation, social distancing, etc.?

An email with this message revived my sewing interest.

Design Challenge: Hoodies Anyone?

“Our first challenge is to invite our users to make a garment using the Hood as found in Garment Designer.”

 I have owned Garment Designer (GD) pattern drafting software for about 6 years.  I attended a fabulous GD workshop in New Mexico a couple years, but have not used it much since. I had to search for the software CD and security hasp to load it on my current laptop. 

Software Website: Cochenille

Youtube:CochenilleSoftware

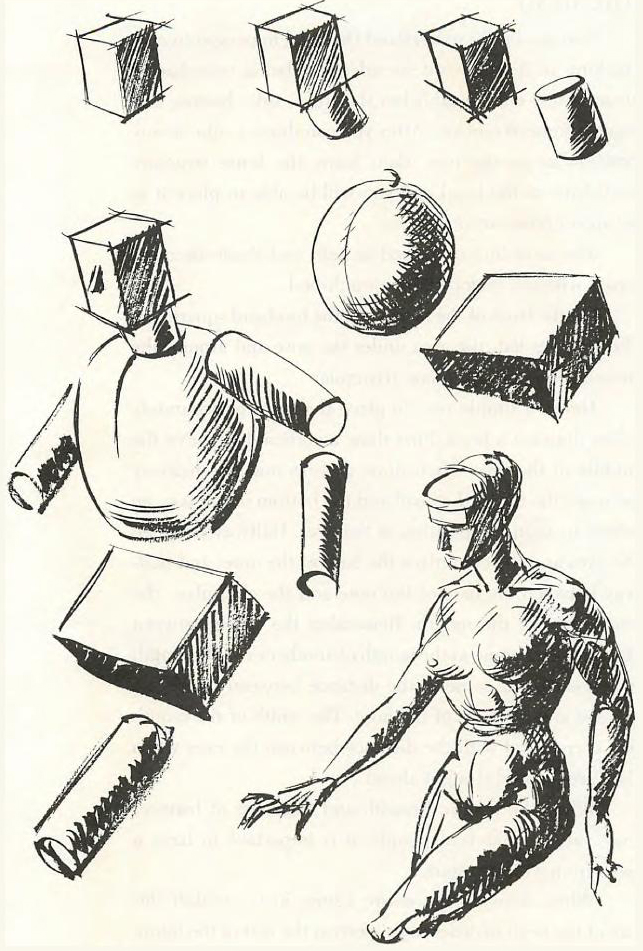
 Hoods have never been on my radar.  I am not a fan because when worn up, they block my peripheral vision.  Give me a hat anytime.  But that said, it was interesting to learn about hoods. How they are considered to be a "collar".  And how to  measure yourself and draft a hood based on your head width and height,  as explained very clearly in these YouTube videos from Diane Denzel

Pattern a Basic Hood

 Hood Pattern with Modifications

I was actually surprised at the wide variety of hood shapes. From basic (looks like a monk's hood) to the close fitting, multi seamed shapes of performance outerwear, and the unique but bazaar hoods of designer Issey Miyake.   Part of my reason for reviewing hood drafting methods was to compare them to the hood options in GD so I understood the drafting rules, ease etc.  used by the software. 

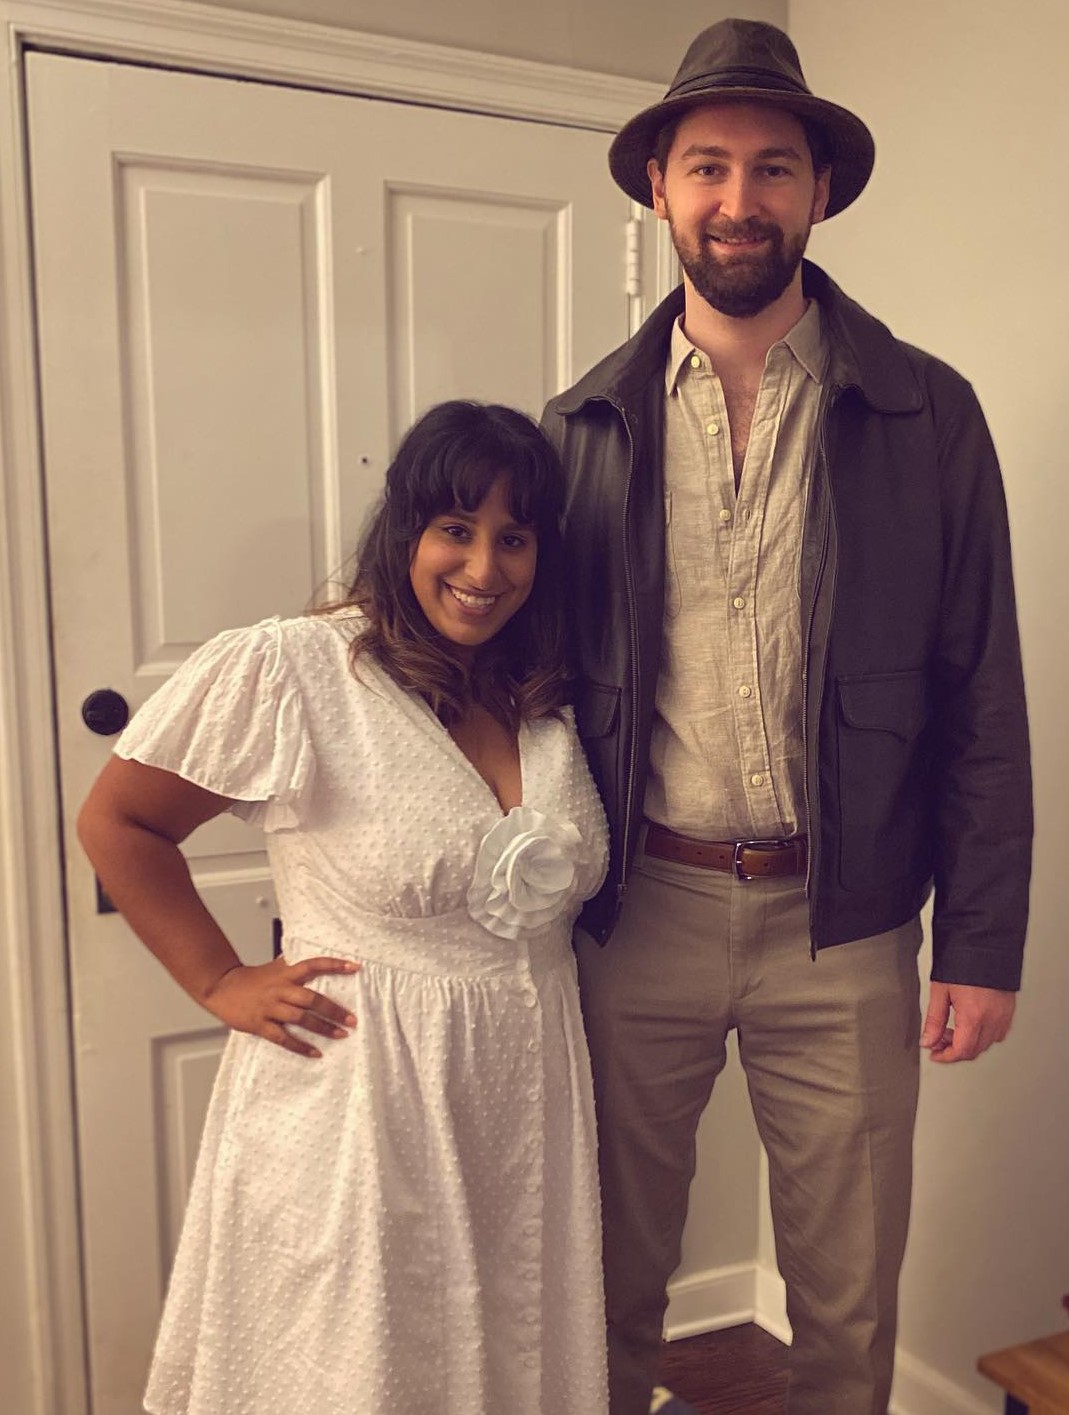
Though I found some fabulous, hooded garment as inspirations, I had to choose one that was draftable based on my GD skills, and sewable by the Challenge due date.  Here is the photo of the inspiration garment.

Hoodie inspiration photo

 It is a slightly flared, long cardigan, with a wide center band that starts at the hem and extends up the front and becomes the front section of the hood.  When the hood is down, the band is like a big lapel that goes over the shoulder.   The back, front and sleeves were easy to draft in GD, but I did have to manipulate the default hood pattern shape to factor in the band, and add the band piece itself using the Shape feature.  I have included a picture of the GD pattern which includes information that other users can use to draft their own version.  I know I really appreciate finding GD tips and patterns on the internet. 

Garment Designer Hoodie Pattern


The wide front band of this cardigan is a wonderful place for embellishment or color blocking. 


Embellishment

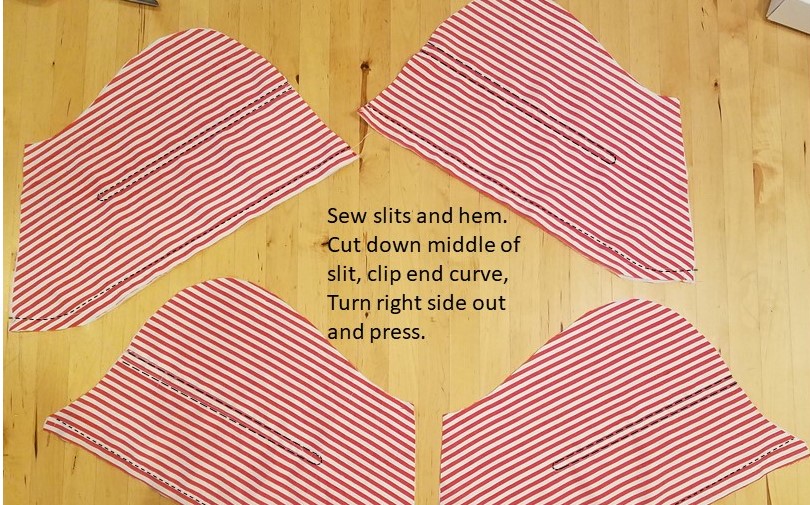
I chose to embellish it with appliques made from the same fabric, but with the wrong side (fuzzy) up to create tonal, textural contrast. I cut circles and donut shapes and applied fusible web to the back/ smooth side of the shapes.  These were ironed to the front band.

The fabric I used is “Sage Mock-Bamboo 10 Ounce Sweatshirt Fleece Knit” of .95 rayon .5 spandex from  Nick of Time Fabric This fabric was wonderfully thick, soft and drapey.  I like to sew knit garments, made from “new to me” patterns, on the sewing machine to test the fit before serging.  This fabric was not fun to sew on the sewing machine.  It did not feed well because of the thickness and stretchiness. It was a dream to sew on the serger. 

 Yesterday it was so dark and rainy, the light sensor on the outside Christmas lights turned them on at 2 PM,  thinking it was dusk.  Depressing.  But today it is crisp and clear  and perfect for a few outdoor pictures. 

Hoodie - drafted in Garment Designer software


Hoodie


Thursday, December 3, 2020

Sewing for Others - Scrubs

As I sew more for others, my respect for custom clothiers increases. My clients are family members who are naively confident in my skills. Another reason to love them!  But to work with  paying clients, each with  a different body shape, fashion taste, and fit preference would be so stressful.

N, one of the future DILs (daughter-in-law), asked me to make her some scrubs for her birthday.  When she is working at the hospital, she must wear the scrubs in the specified color of her department.  But when working in the offsite locations affiliated with the hospital, she can wear her own. I said yes and was quite proud of myself for having snagged a bunch of scrub patterns off the ASG giveaway table last year.  “Aha, I thought, a chance to sew simple styles in cute cotton prints.”  Wrong!

Scrub Patterns

 She showed me pictures on the internet of the type of scrubs she wanted.  Um, not even close in style to the patterns and the fabrics were all poly spandex  blends.

Inspo Pics

I was taking my mom to medical appointments at the time and  while waiting for the Dr.,  Mom and I  took the opportunity to look at and discuss the scrubs the nurses were wearing.  We also asked the nurses what they liked and disliked about their scrubs. They were happy to chat. Comfort and pockets were the most important features.  

Like all of us, N has her own unique body shape.  She is young and fit (daily boot camp style fitness workouts every morning at 6 AM), with a proportionally small waist, a flat tummy, and curvy derriere. The opposite, in all areas, of the body I normally sew for. I have a large waist, curved tummy, and a flat butt.

To avert the fitting confidence paralysis I was starting to feel,  I asked her to loan me her favorite, best fitting scrubs.   I decided to copy the RTW scrub  top and bottom.  The top was a V neck tunic with princess seams extending into pockets. It had bands at the neckline and pocket openings that were  sewn and turned to the outside to provided a neat, clean finish.


Scrub Top 1

 The top was easy to copy by laying it out flat on paper and using a spiked tracing wheel to transfer the seam lines to the paper.  The pants had an elastic back waistband, a flat front waistband and a drawstring. The elastic waistband and stretch fabric made the pants difficult to lay flat  and copy.  I gave up on that  and used a similar pant pattern, modifying the back for a curvy backside as per a great article  in Threads Magazine, Issue 143-July 2009 "Improve the Bottom Line" (adjust your pants pattern to fit a shapely derriere) by Adrena Johnson. Unfortunately, this article is not available online.  There is an article in the most recent issue of Threads Magazine, Issue 212- January 2021  "Fit the Seat of Your Pants" by Vanessa Nirode with similar information.

I took N to Jo-Ann's Fabrics to pick out fabrics.  She had never been in a fabric store. It was an interesting to experience a total newbie's  visit to a fabric store. Her observations about seeing only fabric, no finished garments on display. How hard is was to choose the appropriate fabric. The long line to the cutting table,  of appropriately distanced customers, each with carts of different fabric.  And the conversation with the cutter, all numbers and units of measure. 

For Scrubs #1 she picked out a poly spandex  print for the top and a black poly spandex double knit for the bottom .  

Scrub Top#1

 The fabrics for Scrubs #2 were three colors of poly spandex double knit. The top was color blocked with banded trim on the sleeve’s neckline and yokes.  When worn, the the sleeves looked like they were raglan sleeves, but on closer inspection they were not. I will remember this trick as inset sleeves fit me better than raglan sleeves, but I like the look of raglan sleeves for casual tops.   I used the  pattern for Scrub top 1, but eliminated the  princess seams, and  made  patterns for the yokes, the shaped trim pieces, and the pockets.

Scrub Top #2

N was delighted by both pairs of scrubs and received many nice comments when she wore them.  And  I got an opportunity to practice my fitting skills.


Scrubs

Thursday, November 5, 2020

Sewing for Others - Costume

 The last few months I have been busy sewing for others.  I volunteered for both projects, inspired by  the requested garment and my affection for the requesters.  It was only after making the commitment that my inner voice said, “What have you gotten yourself into?” Both clients have a significantly different body shapes than I do, and I am not experienced with fitting others.   But how am I going to get better at fitting if I don't practice.  Better family members that paying customers, for practice

The most  recent request was for a replica of the dress worn by the character Marion Ravenwood in the movie Indiana Jones and the Temple of Doom. To be worn to a Halloween party.


The dress  has a fitted top with an empire seam under the bust and floor length skirt. It is also backless with a huge rosette and train on the back.   My client was a very curvy, petite. I showed her pattern options that would look very similar to the actual dress, but had features that would facilitate  fitting.  We chose McCalls 7974.  


I felt  gathers, would be more forgiving than bust darts, for bust  fitting.   The under bust band could be fitted to emphasize her curves .  The skirt gathers start  2 inches above the actual waist. My thinking was that this would make the transition from teeny waist to full hips easier and lengthen her bottom half, making  her look taller.

 I made a muslin of the dress bodice.  A lot of slashing and inserting of fabric in the resulting gaps went on in the first fitting.  Then the apprehension of transferring the muslin changes to the pattern, and wondering if I did it correctly, especially when the resulting bodice shape that was um… unfamiliar.


 I had a fitting instructor that told us to imagine the body as  made up of different shapes; spheres, polyhedrons (pyramid),  cylinders and think about how you would shape fabric over those shapes.  I told myself based on the body shapes I was putting fabric over, the  extra fabric was where it needed to be; low, and near the center. And it ended up fitting beautifully. 


The dress is underlined in a cotton fabric (high grade twin flat sheet from Target).  The  outer fabric is a  lightweight fabric with raised fuzzy dots  that I have always called “dotted swiss”. It was labeled "clipped dot" on Fabric.com where it was purchased. We opted to forgo  the bum rosette and the logistics of finding an undergarment to support a large bust in a backless dress.


"Marion" is very pleased with her dress. She talks about wearing it on other occasions and her favorite feature is the pockets. At least her cell phone won't show like Indiana's does.  

Thursday, October 1, 2020

Bedazzling with Buttons

I was looking for  a creative project to get my mind off the fact I don't need any new clothes for my Covid Isolation/work from home lifestyle, but I have a huge fabric stash of garment fabric. Sigh!  So I was excited to hear of the  Marfy Remnant challenge #Marfyremnantchallenge2020  created by Ann of Youtique Bridal and sewing blogger/youtuber Andrea at SewtoFit.  It was a challenge to use remnants of fabric, which we all have, to make and embellish a garment. The suggested pattern was Marfy 116,  a extended shoulder tunic with yoke, vertical princess seams and hi low hem.  The pattern was selected because both Ann and Andrea had won it in an ASG event. It was also a free pattern in the Marfy Evergreen pattern magazine.

Marfy 0116

 The remnants I used were men’s shirting pieces purchased in a 15 lb. bag from the Robert Talbott menswear manufacturing facility in Calif. Below is the original advertisement from Threads Magazine. Yes, these remnants have been in my stash for a while.

Advertisement for Scraps


I received a huge bag packed tightly with striped checked  and solid, very finely woven, cotton  fabrics.  The remnants were generally abut 16” by 20”. Wonderful fabric to work with.  I sewed my adolescent sons button-down shirts out of this fabric. Also quilts, masks and now this top.  I still have a huge amount remaining.

Supplies

Because of the remnant sizes, I color blocked the top. But I still had to do a fair amount of piecing to get pieces large enough for the color blocking.  The back and back yoke have a center back seam.  The extended bottom in the back are separate pieces with the stripes going horizontally.  Fortunately the stripes are so fine, they look like a  solid color from a normal viewing distance.

When my mother moved in with me, she brought her button stash. One drawer in her button box was full of mismatched shirt buttons. Shirt buttons to go with the shirting fabrics! I sewed them to the yoke area of the top. Bedazzling with buttons! 

 I had recently made fabric cord  for the button loop on a silk blouse and decided to see if I could make really fine cord with these shirting fabric. I call it fabric cord, but all my sewing books refer to it as "tubing" or "self filled tubing" and the technique for making it is under button closures - loops. My first strand was less than 1/8 inch,  but it was difficult to sew and turn.  So the sake of time and my sanity, the others were a more doable 1/8”. 

Cording

 Now that I had all these cords. What should I do with them? I shaped and hand tacked the cording into flower shapes with a hole in the center so they could be fastened over the buttons. They are removable. I like the look of the airy flowers on the yoke of the top,

Back yoke


It was a fun challenge.

Monday, September 14, 2020

Criss Cross Applesauce

I am not ready to let go of summer and start sewing for fall. I thought the Sept. Burda magazine might be inspiring, but it has still not arrived.  And the two new patterns ordered from Sewing Workshop (California)  seems to be following the same slow mail trail.   So, I was paging through a couple Mrs Stylebook issues still littering my sewing table from my last project.  I decided to do another drafting project, to keep the momentum going on the drafting self-education.   My casual lifestyle wardrobe includes blouse and they are relatively easy to draft. And I found one with  an interesting sleeve. Here is the  magazine picture. I know. Not real flattering  or inspiring. I totally passed it over. 


It was the drafting instructions for the sleeve that caught my eye.

The translated description is "Origami-like sleeve blouse.  If you look closely, it is a striped blouse composed of multiple colors.  The point is the elaborate sleeves made by stacking rectangular cloth parts.  The material is cotton.  Blouse (39,000 yen) The Cage (Igit and Co., Ltd. Omotesando)" 

 The description makes me think MSB must find ready to wear (RTW) garments and create drafting instruction for them. The sleeves appear be woven, which is emphasized by the use of striped fabric. The garment on the model looked a bit oversize, including the sleeves. 


The shirt had a yoke with extended shoulders, collar and collar stand, a hidden button placket and deep faced curved hem.  

The sleeve pattern is remarkably like a tulip sleeve pattern, but with an angled slash that creates two strips that can be interwoven with the other sleeve half.


My fabric is a  deep stash, red and white silk dupioni  that I machine washed and dried.  The sleeves and yoke lining are white 65% Poly/35% Cotton Sheermist Batiste Fabric.


This was a fun exercise. I learned a couple things. The finished garment looks like the picture on model, very oversize.  In future, I will reduce the  amount to extend shoulder and side seams for  on oversize styles like this. I was pleasantly surprised to find sleeve actually worked. I made mine narrower that the drafting instructions specified and think it looks neater.  Maybe I could extend the slashes the full length of sleeve for a costume.  Reason I am thinking about this is I got a request for a Halloween costume yesterday. A weird lookin cosplay character. 

The title of the blog post was what popped it my head when I thought of the sleeve design.  It took me a minute to realize it is part of a rhyme that teachers say to students when they want them to quiet down and sit cross-legged on the floor. 

Criss-Cross Applesauce, Give your hands a clap. Criss-Cross Applesauce. Put them in your lap. 


Sunday, August 2, 2020

Mrs Style Book Skirt

I have had a subscription to the Japanese pattern magazine  Mrs Style Book for many years but have only made a handful of garments.  The magazine features many skirt patterns both traditional and also some really bizarre styles that remind me of designers such as  Issey Miyake and Rei Kawaakubo.  When Stefanie of Sea of Teal announced the wardrobe basic for July as skirts, I set myself the goal of using a  Mrs Style Book pattern for my skirt. I chose a more traditional skirt from the Spring 2020 issue.


The text translation is "A mermaid skirt with flare from the hip line 
Hint!  Large patterns and directional prints can be used by carefully matching the patterns.
 The clean silhouette and flared hem that swings every time you walk make it an elegant accent.  The mermaid skirt has a flared pattern from the hip line down.  The hemline has a descent on the back for a fresher look.  The material is linen with a light texture.  After finishing, wash it and dress it roughly without ironing.  ●Pattern / P.101 

Here are the pattern drafting instructions.


I find the drafting drawings very easy to understand, but I also use the Google Translate app on my phone to translate the Japanese characters. I just aim my phone camera at the text, scan it, select all and it translates the whole paragraph. This gives me additional information that can't be shown in a drawing. Such as the amount and type of fabric needed for the skirt. -  Usage amount cloth (description and ordering info P.230) = 144cm Width, 3m 10cm 

The fabric  is shown on another page and is  available via mail order.


Elegance "Elegance Mrs. Stylebook Manager" 03-3891-8998 33-10, 5-3 Higashi-nippori, Arakawa-ku, Tokyo http://store.shopping.yahoo.co.jp/nippori-pakira/ P.52〜  55 "Pattern to show the wearer a clean look" B fabric ● Madras check (100% linen) 144cm width 1m 1,480 yen ( $14 USD)  Black 6 Beige 2 Yellow 3 White Blue (used color)

 The instructions for my skirt referred to detailed pocket sewing instructions on another skirt pattern/page.


My fabric is from Hobby Lobby, a blue and white cotton plaid with silver metallic threads.  It worked great for this skirt. 


 The pattern drafting was fairly easy though getting nice flare curves, and side lengths that matched took a bit of effort. I did lengthen the waist to hip measurement by 2 cm to match mine, and the hip to hem measurement by 4 cm because I am a bit taller. 

I sewed this skirt and wore it on our annual beach vacation in Delaware. Delaware is open which meant that backing out of the beach house rental agreement would have cost us a lot of money.  All the people that vacation with us have been socializing with us for the past several months and were known to be Corvid free. 


There were less traffic and people on the boardwalk and beaches, which was actually very nice.  One downsides for the young people in the group  were that their  favorite restaurant had eliminated happy hours and half priced drinks. Not enough customer volume.  Bumper Cars was not as fun with only 6 cars on the floor at a time.  A lot less bumping going on and isn't that the objective of this amusement ride?


Wearing a mask while walking on the boardwalk in sunny, hot, humid weather was absolutely miserable.  It felt hard to breath. One solution was to buy an ice cream code or boardwalk french fries, as no mask was required while eating  at a safe social distance. Vacation was fun, but it is good to be back home and making healthier snacking choices..


Monday, July 13, 2020

Birthday Suit

I had a birthday recently, and in lieu of presents I chose to go out for dinner with the family. A good excuse to sew something special.  July in Virginia is hot, with temperatures over 90 F, and humid. What with the requirement for social distancing, many restaurants have expanded their dining areas outside (often called patio dining).  A loose flowy dress seemed a good choice for outside dining, but I was missing the structured garments I used to make for a work environment. A good compromise: a birthday suit consisting of sleeveless vest and knee length shorts.  I originally chose Burda 7074, a collared vest that I had admired on another blog. 

But the fabric situation required another solution. I recently purchased 2 yards of a lovely lavender cotton/spandex fabric from Vogue Fabrics.  It was labeled as shirting but when it arrived, it was definitely bottom weight fabric.


Though the perfect color, the 2 yards was not enough fabric to make a pair of shorts and a collared vest. However, Vogue Pattern 1707, a collarless, lined to the edge vest (no facings)
combined with Burda 12 2010 108 for the shorts was possible with only  2 yards of 54" fabric.  The pant pattern is high waisted, flat front. I made them knee length and tapered an additional inch on each side of the legs. 

The vest is lined with a similar shade of lavender silk crepe, part of a 8.5 yard "remnant" I bought from Trim Fabric in NYC in 2005 for $40.00. I got some great bargains from them back then.

I don't know if Vogue has changed their draft or my body is changing again, but the front bust dart on this pattern had 4" of take-up which made the cup size huge. My sloper waist bust dart take-up is 2".  The back peplum was also shaped for very curved, bodacious butt. It looked like I needed a padded insert to fill it out until I altered it to my shape.

I also made a coordinating mask. The lining is cotton, the outer layer is glittery mesh over the silk georgette, topped with a lace applique. Everyone dressed up and we had a great time.


Vogue 1707
Vogue 1707
Coordinating Mask

With matching mask


 With the girls (future DIL's)