Sunday, February 12, 2012

Road Trip Report

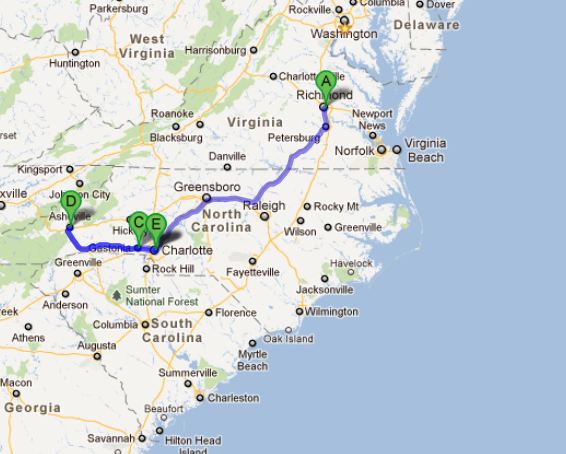
Last weekend, my friend Paula and I took a fabric/fashion road trip, traveling south west to the cities of Charlotte and Asheville, in the state of  North Carolina.
Road Trip route
Stops included several independent fabric stores, a thread outlet, snoop shopping at Neiman Marcus and Bellagio, and a museum exhibit of Chanel garments.  
Friday morning, bright and early, we headed to Charlotte, NC, a 4.5 hour drive south west from Richmond, VA. Our first stop was Charlie Rector’s thread store.
Long Wood Mills

That is Mr. Rector on the bench in front. He warned us he was a little hard of hearing and slow moving But he was definitely a charmer, with lots of stories about the southern textile industry.
Bench Requirements

My aunts and grandmother worked in textiles mills, near St. Pauls, NC, in the 50’s and 60’s. I remember going on a factory tour with my aunt and being awed by the complex and fast moving machinery weaving fabric. Those mills are long gone now.
Aisles and Aisles of Thread
This store stocks massive quantities of serger and embroidery threads at excellent prices. I bought serger thread in colors I can’t find locally, and some heavier thread to use in the serger loopers for edge finishes. I also enjoyed looking at some old machinary in the back room, that winds 6 individual strands of thread into a twisted cord. I want one of these!
Cord Winder
The second stop that day was Mary Jo's cloth store. This little door opens into a 32,000 sq. ft. fabric store in Gastonia, NC.


It had an impressive amount of quilting and home dec. fabric and many beautiful bridal trims and laces, but not much of the high end silk and wool garment fabric I was hoping to find. I bought some solid colored 100% wools for slacks, which were a good value for $10/yard.
That evening, after dinner we headed to the designer department at the nearby Neiman Marcus store and happily touched and examined the garments until the lights dimmed to indicate the store was closing.
The next day started with a 2 hour drive to Asheville, NC. Rain and fog shrouded the mountains during our trip, but the sky cleared when we arrived in town. After a quick lunch in one of the village eateries, we stopped in at Bellagio A store full of art to wear garments and hand crafted jewelry. So may beautiful garments and embellishment ideas. Their web site has wonderful pictures for inspiration.

From there it was a short walk to Waechter's Fine Fabrics.
Waechter's Fabric Store

   I often browse their web site and admired the fabrics. They are gorgeous and very pricey. Definitely above my "have to have" price point. The button selection was awesome, and they carry many of the independent pattern lines. I really enjoyed seeing the sample garments made from their fabrics. All are pictured under the inspiration tab on the web site. After seeing this sample garment of the Decades of Style Matinee Blouse, I had to buy the pattern. When I lifted up the bottom edge of the front to examine the hem, I saw a sticky note on the dress form with this written on it. "yes, you will have to wear leggings" Hee Hee

Decades of Style - Matinee Blouse
As we walked out of the store I picked up a brochure for a Fabric, Fiber, Bead Trail which listed other area shops selling beads, fabric, and yarn. With the help of Paula's GPS we found and visited several of the shops in the brochure. I purchased some vintage fabrics from Kitch Fabrics and we headed back to Charlotte after a long day.
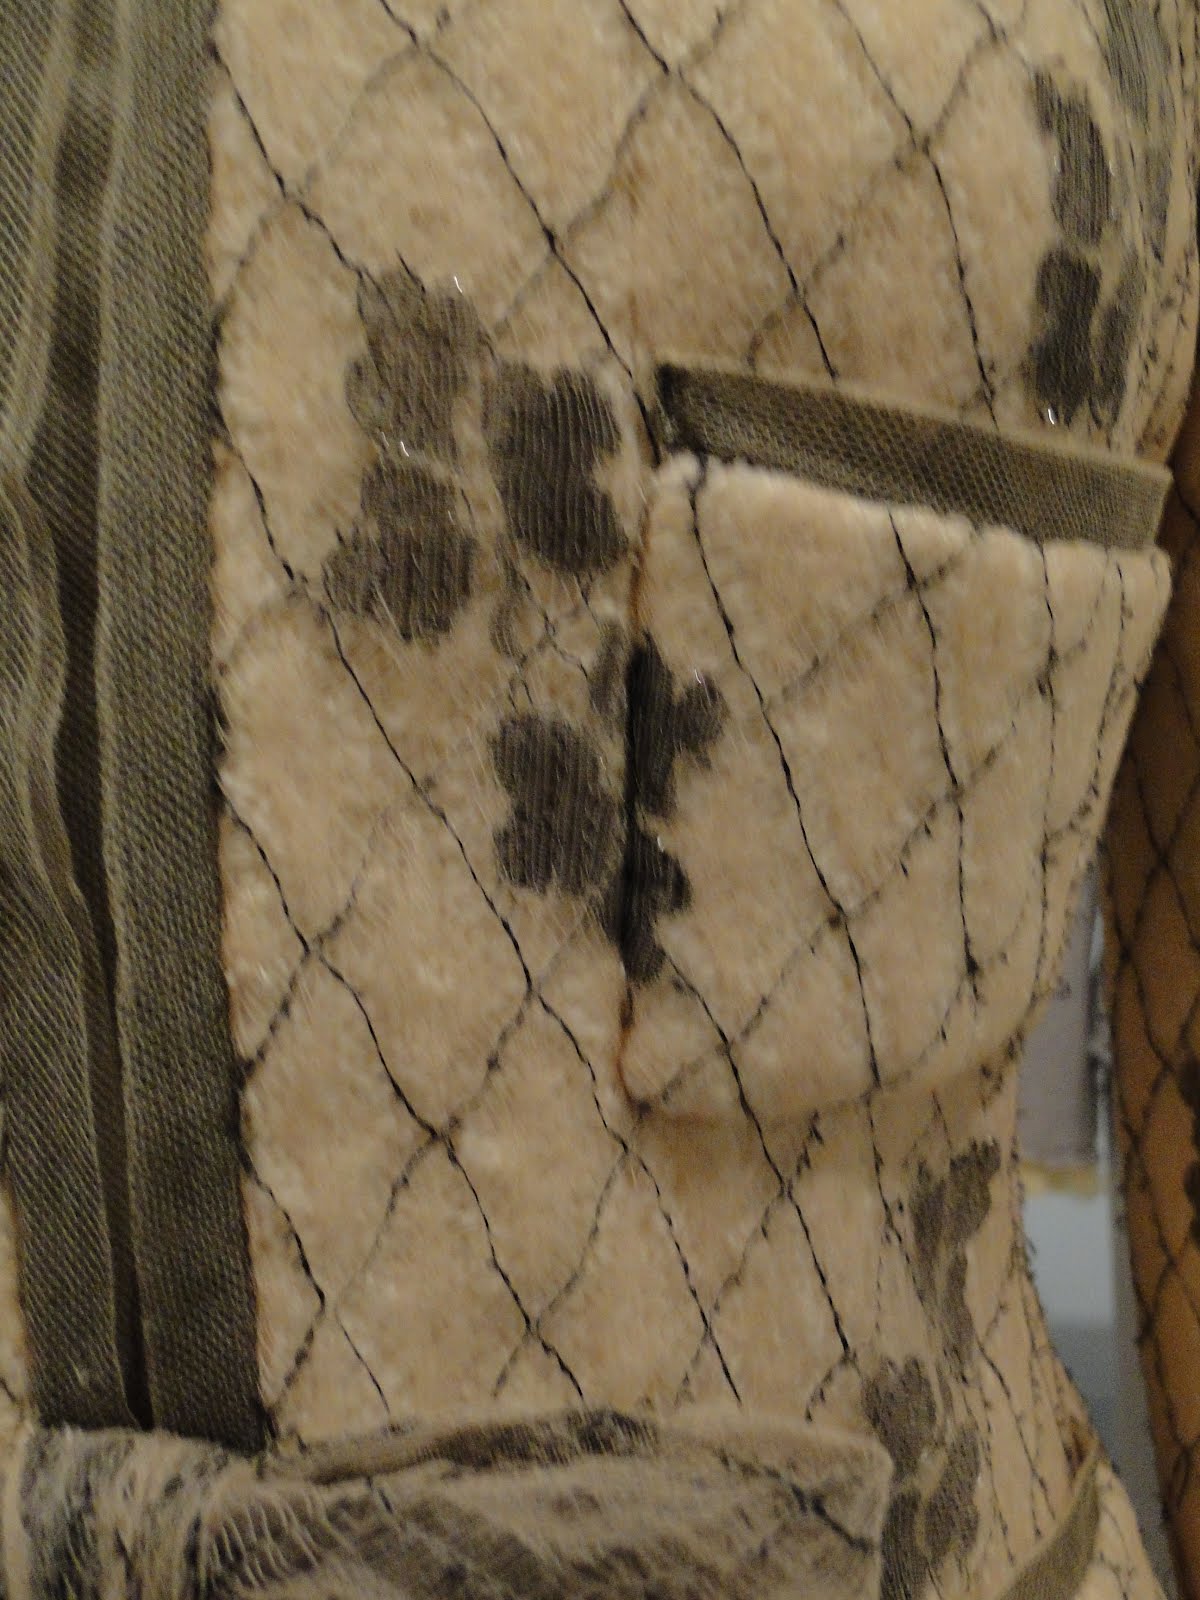
On the last day of our trip we went to the Charlotte Mint Musuem’s exhibit: Chanel - Designs for the Modern Woman. On view through 26 February 2012. The Chanel garments were from the 1980 to 2010 time frame and there was only 18 of them. But those few garments had a wealth of details to examine and marvel over. And they were displayed in a way that we could get very close to them, as long as we did not touch. I took lots of pictures, but I also did some line drawings to help me remember some of the seaming which was so well pressed, it was difficult to see in the photos.


Almost all the garments had princess seams of some sort, most of them originating from the shoulder. I think this is the key to the Chanel silhouette and fit. Several of the jackets had the three piece sleeves which Chanel is known for. And the matching of plaids, seam lines and lace motifs were impeccable.


hand sewn whip stitches affix fine silk tissue ribbon to edge


Silk net lace over wool.  Notice the matching


Chanel printed on every closure -all 7 of them!


Close up of beaded button


The car travel time passed quickly thanks to the two music play lists that Paula's DH created for our trip. Charlotte1 for the trip down and Charlotte2 for the trip back. Each song was a surprise. They triggered memories; "I saw that group in concert when I was 17." Or "Aww, that's so sweet!" moments - a song sung at Paula and Gerry's wedding. Or "I can't remember my PIN, but I remember the name of the one hit wonder group that did this song 30 years ago!"  moment.

The trip was great fun. We saw a lot and bought a little. Now I really want to do some sewing.

Tuesday, January 31, 2012

Burda Color Block

So one Saturday not long ago, I was happily sewing a Roland Mouret inspired dress. My DH yells “Mail is here!” I take a break to see if any of the vintage patterns I ordered had arrived. No patterns, but the BurdaStyle Feb. issue was there, a week earlier than normal. Since I am on a sewing break, I decide to look at the magazine. I see the color block version of dress and my SAD (Sewing Attention Deficit) kicks in.
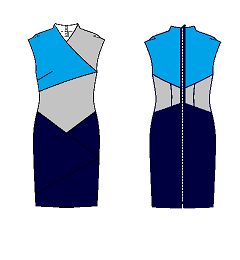
Burda Feb 2012 #117

Roland was pushed to the side and I immediately started the process of tracing the pattern. Of course it helped that the gray and navy ponte knits I was using for the Roland dress could also be used for the Burda dress. The magazine show 4 colors used for the color blocking.  I consider using bright blue and aqua as colors 3 and 4.
4 color combination
3 color combination
but decided to use a 3 color combo.
Alternate 3 color combination
I wished I had some orange ponte knit. I really like the orange, gray, and navy color block combo.

BurdaStyle magazine pattern tracing is not my favorite activity, and tracing this pattern seemed to take longer than usual. The factors that caused this were the pattern lines being printed in red, there were lots of them, and they were irregular shapes. Red lines are hard to see through my tracing paper, especially when they cross the solid red patterns also printed on the same sheet. I also tend to look for familiar shaped pattern pieces rather than use the numbers printed along the sheet border to locate the pieces. I couldn’t get away with that on this pattern.

There is a lot of shaping in the seams of this dress. The visible bust dart is balanced by a dart incorporated in the seam on the opposite side. Waist shaping is also done in the V seam at the bottom of the front waist sections. The center back seam curves in at the waist, out over the butt and back in underneath it. Great for callipygians - those who have shapely buttocks (my dad taught me that word along time ago and I still enjoy saying it) But since I am not one, that seam got straighten from waist to hem.

Shaping in seams

I recommend tracing and adding seam allowances accurately so you don’t lose all this subtle shaping. Some of the odd shaped pattern pieces are cut out once and care had to be taken to ensure they are cut oriented correctly on the right side of the fabric. I almost ended up with a reverse image dress because I was not paying attention during the cutting out. To make assembly go faster, I laid the cut pieces out on a flat surface as they would be placed in the finished dress. There are illustrated instructions for this dress in the pattern supplement, which is helpful.

I did not install a working zipper in the back as the pattern instructions suggest. I sewed the front overlap partially shut leaving just enough room for me to pull the dress over my head. I sewed invisible, iron resistant, nylon snaps to hold the front closed after the dress was on.

Snaps
I liked the exposed zipper down the back as shown in the magazine, but for the length of my dress it had to be 41 inches, with an open bottom and either blue or gray. Not available in my local fabric stores! I special ordered a zipper from www.zippersource.com  It took two weeks to arrive. Much longer than any previous custom orders, and it is what delayed this post about the dress. I used a 1.25 wide satin ribbon to stabilize the center back seam and prevent it from stretching from the weight of the zipper. I chose a wide ribbon so it would be under the whole width of the zipper. I hand basted the ribbon over the center back seam on the inside of the dress.
back seam stabilized with ribbon

I then hand basted the zipper over the center back seam on the outside of the dress. And lastly, sewed the zipper in place with four lines of stitching. One along the outer edge of the zipper tape and one against the teeth, on both sides of the zipper.

Zipper basted in place

  I like the dress a lot. The colors make me happy. The bright blue pendant shape on top draws the eyes away for lower, wider parts. It is very comfortable. Now to get back to the neglected Roland dress.


Saturday, January 21, 2012

Catching Up

Well, work has been every bit as stressful as I thought it would be when I was told I was taking over the responsibilities of my coworker, in addition to the ones I already had. “Drinking from a fire hose” is an apt description of how I felt the first two weeks. So much information, as well as phone calls and emails about problems, coming at me non stop. My new responsibilities now include the day to day support of applications that track the hourly workforce work time and attendance.  We have multiple unions, each with their own convoluted and complicated pay rules. The union contract pay rules must be reflected correctly in the application or paychecks are incorrect. People get very upset over incorrect paychecks. Imagine that! This week I am finally starting to feel I will eventually have a good knowledge of the applications and be able to fix my clients’ problems quickly and efficiently, which is a huge factor in my job satisfaction.

Sewing is my de-stressor. Blogging about sewing is low priority, which means I have some catching up to do.

I finished up the last two pieces of my 6 PAK wardrobe plus two extra ones. Here is the story board for this mini wardrobe.

Misty Morning 6 PAC Story Board

Kwik Sew 3915 a close fitting pull over top with full length sleeves and V-neckline with lapped collar that is gathered at front neckline with four decorative buttons and loops.
I made it out of a print rayon Lycra knit.

Kwik Sew 3915
 Actually I used a TNT T-shirt pattern and added the Kwik Sew collar to it. Why? Well the Kwik Sew sizing is S,M and L. To fit the measurements in each of those size ranges, the sleeve pattern back and front armhole curve is the same length, with a short cap height which results in a wider sleeve. I need a more shaped sleeve cap with back armhole length longer than the front. Also I prefer a narrower, close fitting sleeve in a knit top, which the higher sleeve cap creates.


My TNT knit top pattern is an older New Look pattern.
New Look 6779


The second pair of pants is Silhouette Yoga Pant pattern made in a gray heavy weigh poly/rayon/lycra ponte knit.


At the sewing expo, Peggy Sagers, the designer of Silhouette patterns, was wearing a pair of these pants and they looked very polished and comfortable. Not at all like she was on her way to yoga class. The pant pattern includes a fabric covered, 2 inch wide elastic waist band and seaming down the front and back legs. By the way, the line drawing of the pant front on the website is incorrect. It looks like this. Hint: seams on front leg.


When I emailed to ask if the pattern had been changed, Peggy replied "Thanks for bringing that to my attention...we had put the pattern back envelope up on the website and before printing noticed the error and clearly, did not go back and fix...we will do...so thanks, we will get it fixed...the back of the pattern is correct in the printing, but not on the website...thanks again...Peggy"


The extra garments were both made with Silhouette patterns. Peggy got a lot of my money at the sewing expo. A raglan sleeve knit top pattern with shirred sleeves and princess seams, made of a light weight, opaque, dark gray poly Lycra knit.
Silhouette Pattern #110
I liked the shirring and the princess seaming, which is only in the larger women's sizes, not the kid sizes which are also included in the pattern. I did have to add some width at the hips area as the pattern seemed to be drafted for a body whose hips were smaller than bust.


Silhouette Pattern 110

And a very loose-fitting, pullover top with one-piece twist front (wrong side shows)


Silhouette Pattern 95
The fabric is a rayon gauze, very drapey with an open weave. This top was quick to make. Hemming the edges of the front and back pieces took the longest time. I used a rolled hem, but in hindsight, a serged edge would have looked just as good and made the task quicker. I have always admired the bohemian look of this type of garment when it is worn by others, but it is way out of my comfort zone of tailored, fitted tops. Still, I will try anything once. I like it, but it is so drapey it gets in the way when I am working with my hands and it catches on things. It has been consigned to my “wear to a stand around and look good” wardrobe for a party, lecture, or art show.

All of the Silhouette Patterns are available at this website. Silhouette patterns.

Here is some pictures of the new garments worn in combination with the older ones.