 |
| Hot Pattern 1146 Deco Vibe Shadow Woven T Shirt |
I really like the bands on the bodice sides, on the neckline, across the shoulders and down the sleeve. Using a darker color on the bands create a slimming look in the torso, and horizontal lines across the shoulders. All good style lines for my pear shaped body. I wanted to test the pattern first. I have never made a Hot Pattern. I have purchased several, some right after the company launched many years ago. The people that rave about HP are not shaped like me and there seem to be more reviews of knit tops than woven garments, so I have never been motivated to sew one before this. I could not find any reviews or even blog posts about this top.
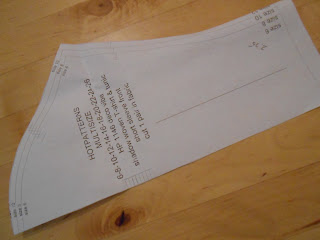
The body measurements on listed on the back of the pattern. My measurements spanned sizes 12-16; bust a size 12, waist size 16, and hip size 14. The finished garments measurement was not provided for this pattern. The difference between finished garment measurements and my body measurements is the ease that would be in the finished top. The ease, more than anything, determines the size I make in any pattern. So I had to cut out all the pattern pieces, pin them together and measure the front and back bodice at bust, waist and hip, remembering to subtract out the seam allowances. I also assembled the sleeve (5 pattern pieces) and measured it too. The finished garment measurements for a size 12 had 2 – 3” ease over my body measurement so that is the size I made. Pinning together the pattern pieces is also a good way to check the pattern drafting accuracy and matching marks, and make sure you have cut out the correct size. Hot Patterns have sizes 6 -26 printed on the same sheet with no differentiation in size line style (dots, dashes, colors). The size labeling is sparse, often only printed next to the line on one side of the pattern. It was under the size line on one piece and over the line on another pattern piece. Finding my size and cutting it out was a tedious, time-consuming activity. The differences is size are infinitesimal in places make a spirograph design of lines. The size 6 line was barely visible on my pattern and since it was the only reference on some pattern pieces (Size 12 was the fourth line as in 6,8,10,12), it was very difficult to determine what line to use for the size I chose.
 |
| Where is my size line? |
 |
| Inconsistent Size labeling |
The fabrics for the first version were a print in a light weight cotton lycra woven and black fabric which was a rayon, poly, lycra ponte knit. I was able to pull this top over my head so I did not put a zipper in the back.
 |
| partially assembled |
This pattern seemed to be "petited" from shoulder to bust. I had to drop the bust darts 2 inches. The arm hole height was a bit short and the sleeve cap height was only 3 inches. Small sleeve heights are common in T- shirt sleeve to provide mobility and reduce the need for armhole ease in the sleeve. I suspect this last reason is why the sleeves in this top were designed this way. No ease facilitates matching the bands in the sleeve (4 seam lines) with the bands in the shoulder and side bodice area. But this armhole did not fit me well and had fabric bunched under the arm. The back width was huge, over an inch and 5/8 wider than the body measurement. Even for a T shirt fit, that is too much back width. I took it out across the shoulders, moving in the back armholes but I should have taken it out all the entire length of the back. The top was huge in the waist area, even after I put in back waist darts.
 |
| Version 1 front |
 |
| Version 1 side |
The sculpture I am posing with is an iron work door on the campus of Radford University where son #2, my baby, is going this fall. I thought the door was symbolic of my son leaving home, opening a door on a new phase of his life, but able to look back and see us on the other side of the door. Can you tell I am not looking forward to an empty nest? We were on campus for orientation. Temps in the 90’s F, severe thunderstorms interspersed with bright sunny skies and 98% humidity. My hair is an excellent hydrometer and in those conditions, will defeat any extra hold hair product on the market. The schedule had us parents walking to different building at opposite ends of the campus for presentations, lectures, dining hall meals. I think they wanted us exhausted and in “info overload’ for the final talk, which was about tuition and a few additional fees.
Version 2 of the top was made using my sloper with the band patterns superimposed over it. Using the larger armholes on my sloper meant drafting a sleeve that had a bit of ease in it. I was able to do this, add the panels to the sleeves, and still match the panels on the garment.
 |
| original sleeve versus new sleeve |
The second version is made from lightweight linen in black and light turquoise. I really like the fit in the shoulder and sleeve much better. Somehow the back is longer than the back on the first version. I need to shorten it, as the first time I sit down , the back will be a wrinkled mess.
I love the style and fit of the 2nd version of the shirt. I strongly recommend making a muslin or test garment of this pattern.


